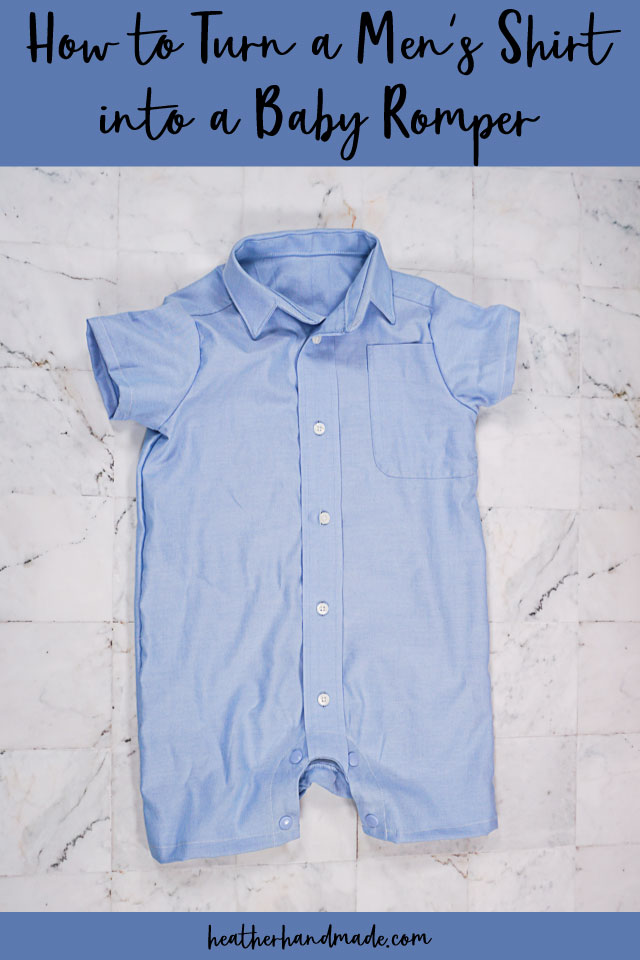
How to Make a Baby Dress Out of a Man's Shirt
Learn how to upcycle a men's shirt into a baby romper with this free 6 mos sewing pattern. This intermediate sewing project is and then beautiful for babies to wear!
I have really, really loved making boy habiliment. Everytime I make something new or am inspired by something, I am grateful I have a male child and get to experiment with his wearable.
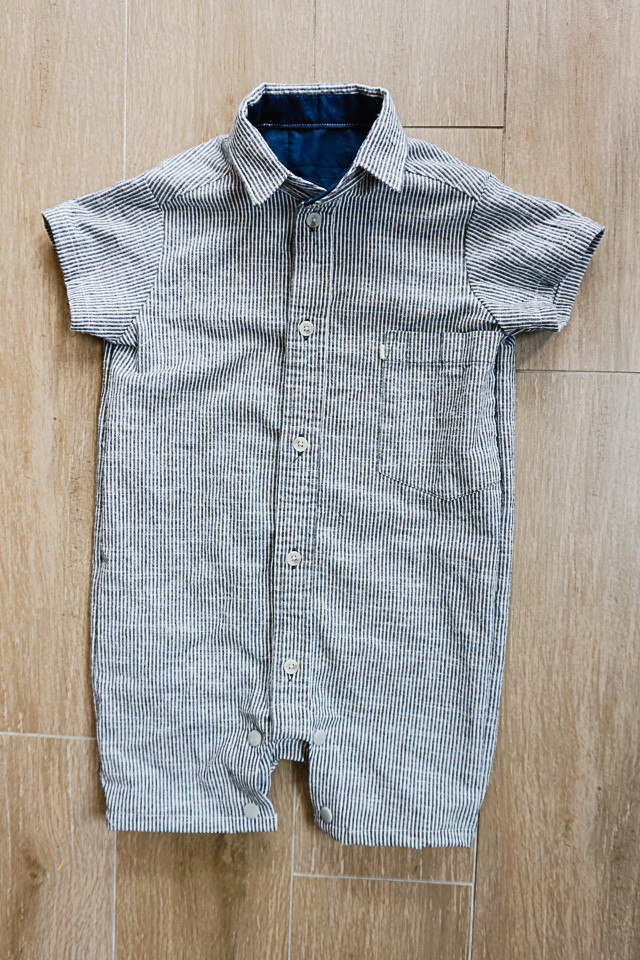
Well, I was commencement inspired past this shirt romper. I thought I would make it from scratch, simply I knew I could easily make something similar by using parts of a man's button upward shirt. Today I take a design and tutorial to share!
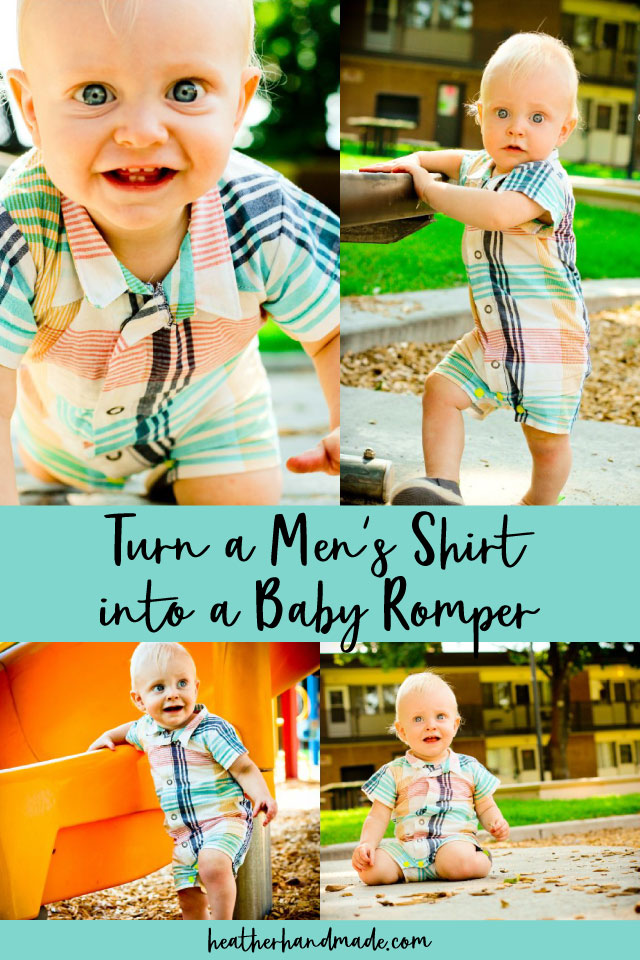
If y'all utilize a lightweight shirt, it's perfect for the hot summer months, and the forepart buttons or snaps are functional because yous use the original shirt front button placket.
Button up shirts are ane of my favorite things to refashion. There's so much fabric, and so many possibilities! Wait at all these push button up shirt refashion tutorials!
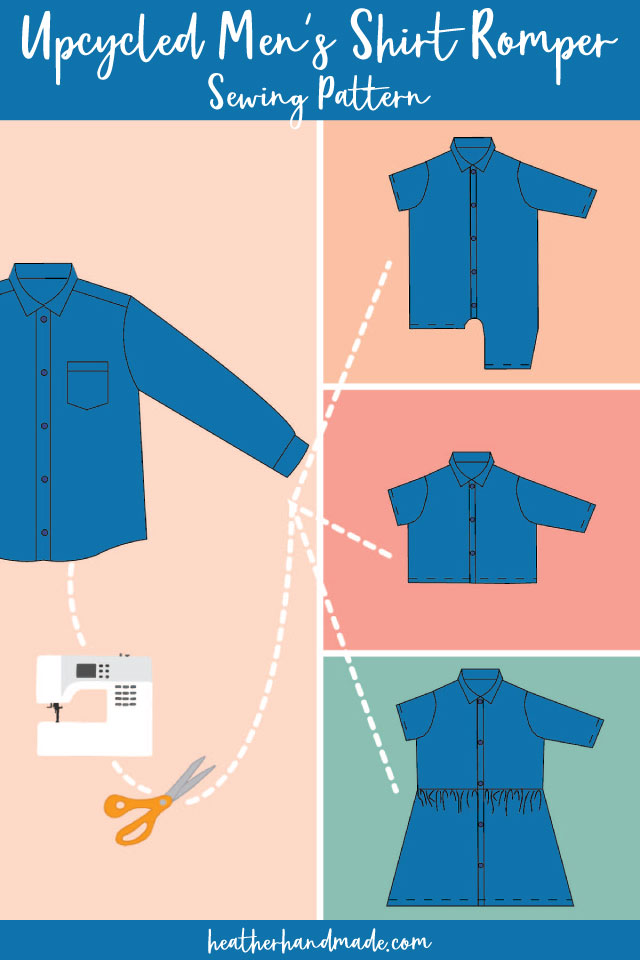
Practise you want the paatern in multiple sizes? Get the Upcycled Men's Shirt Romper, Apparel, and Shirt Sewing Pattern
What is a PDF sewing pattern?
A PDF pattern is a sewing pattern designed on the computer and organized so that information technology can be printed on several letter or A4 size pieces of paper.
I beloved using PDF sewing patterns because if the pattern gets ruined or if my children or I changed sizes, I can e'er print it over again. Information technology'll never exist destroyed since I accept a digital version!
How do you use a PDF sewing pattern?
Open the PDF on a computer and click impress. When press make sure that the scaling is set to 100% or no scaling so that the blueprint prints at the correct size.
Once the pattern is printed it can be taped together to go the full size. And so the pattern can be cutting for each pattern slice size or individual sizes can be traced and so that the pattern can be used again and again.
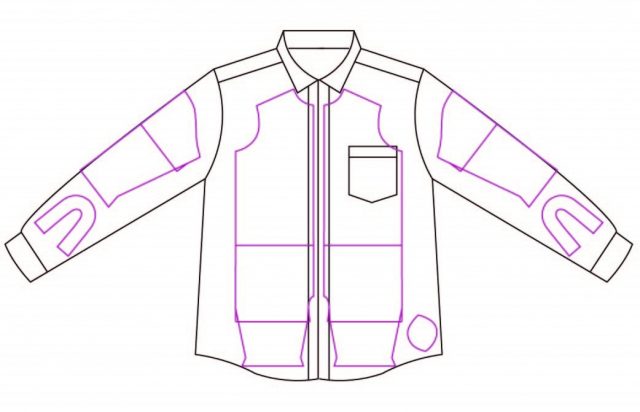
Men's Shirt Baby Romper Free Blueprint and Tutorial
Supplies
- Men'southward push up shirt
- interfacing
- snaps or buttons or other closure
- sewing tools
- sewing machine
- Men's Shirt Romper Sewing Blueprint in size 6 mos – become it at the end of the post
Do you but want the pattern and tutorial as a PDF? Go the design and photograph tutorial for but $3. You lot won't need to admission the net every fourth dimension you desire to make it. Or get the Pattern Parcel with ALL the PDF tutorials!
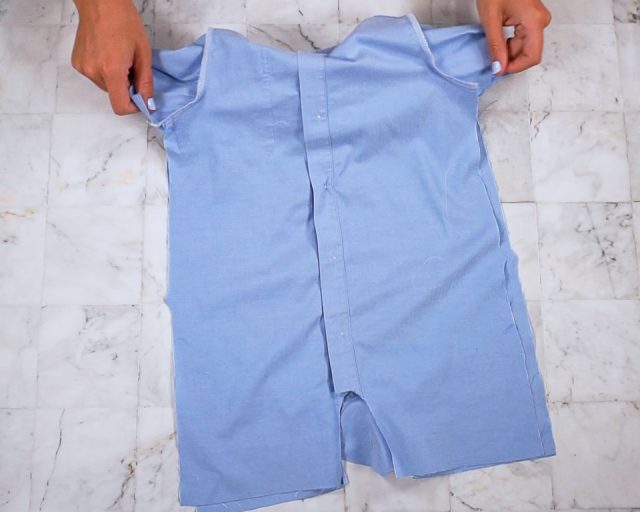
Cut
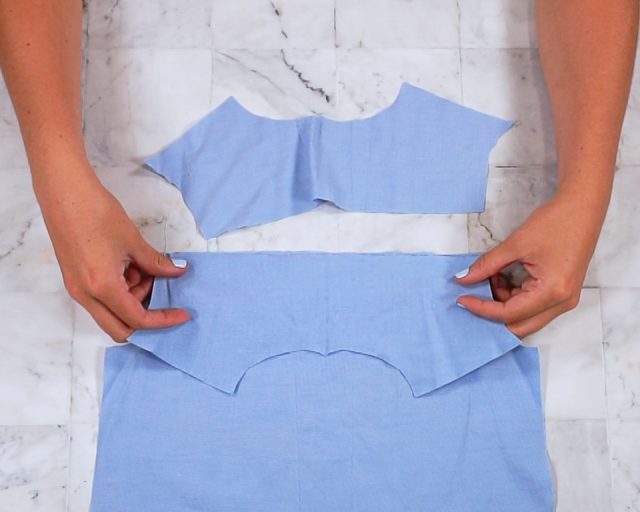
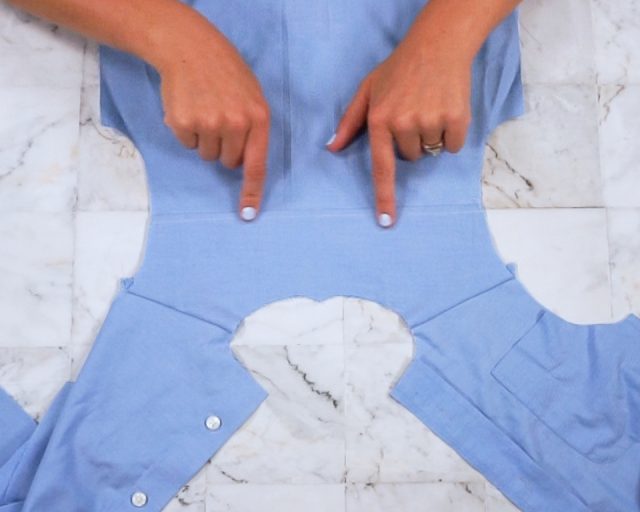
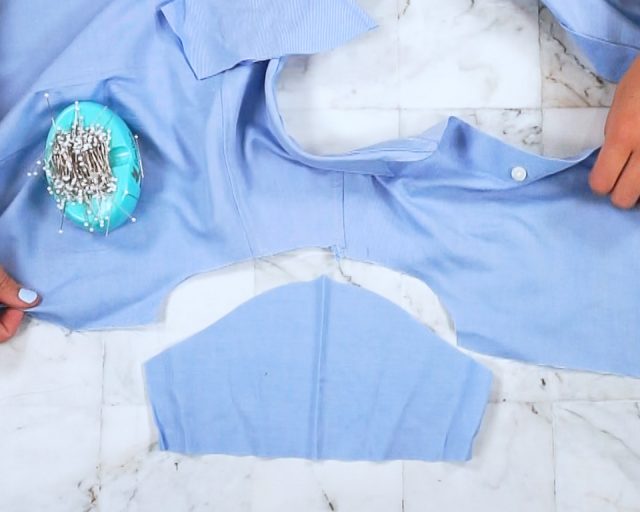
Unbutton the front of the men'due south shirt. Line up the plackets and smooth out the rest of the shirt as y'all can. Cut out the mirrored front body blueprint pieces from the front of the shirt. Line upward the middle front line of the body piece with the line of buttons and buttonholes. Employ the button guides so that you don't cutting through a push button or buttonhole. There'southward a chance that yous volition be cutting through the pocket especially with the smaller sizes.
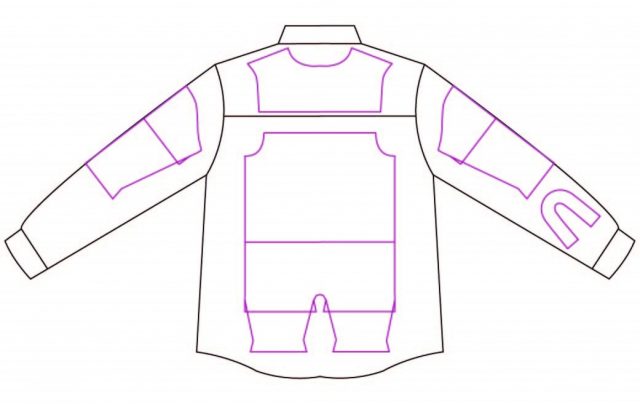
Fold the back of the shirt in half along the middle back. Lay the dorsum body pattern pieces below the yoke forth the fold and cutting them out.
Lay out the yoke pattern slice along the center dorsum fold of the original yoke and cut out ii pieces. When you lot cut from the back yoke yous will automatically cut two yokes at one time.
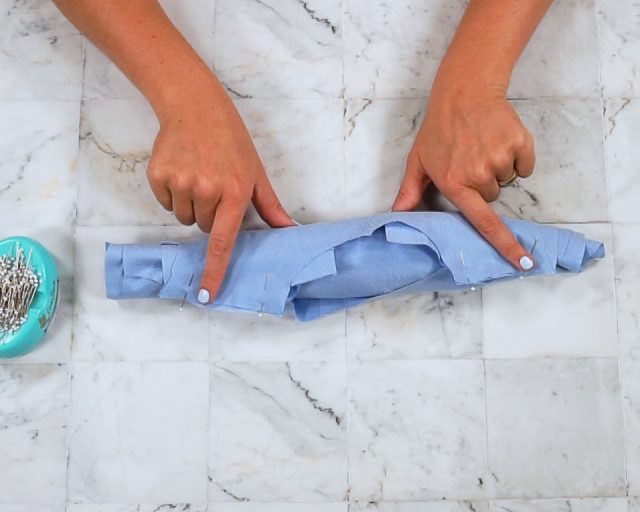
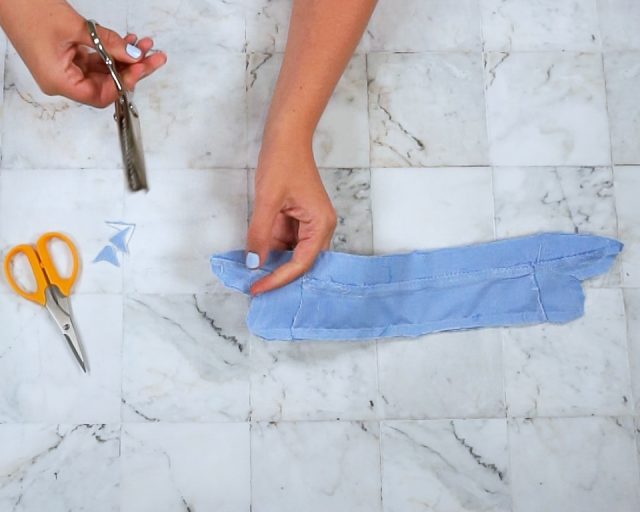
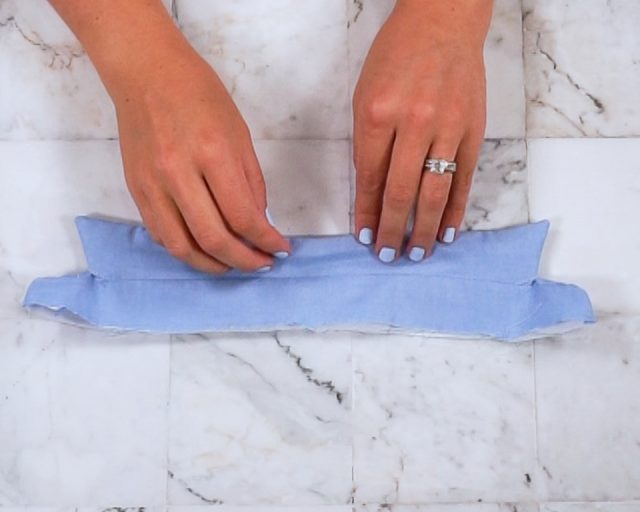
Fold the sleeves along the acme sleeve fold line and identify the sleeve pattern pieces along the fold. Cut out i sleeve from each sleeve.
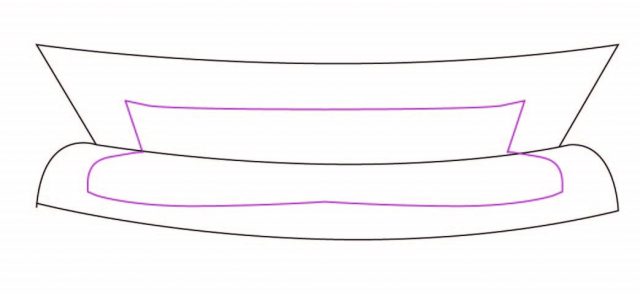
Open the collar and stand up up to lay downwards flat. Identify the collar pattern slice on elevation. Attempt lining upwardly the seam of the collar and stand with the indent of the collar design piece. Cut out two collar pieces. Leave the interfacing attached. When you cut from the collar you will automatically cut two collars at i time. If the neckband is too pocket-sized for the pattern piece, then cutting 2 collar pieces from any fabric left from the shirt.
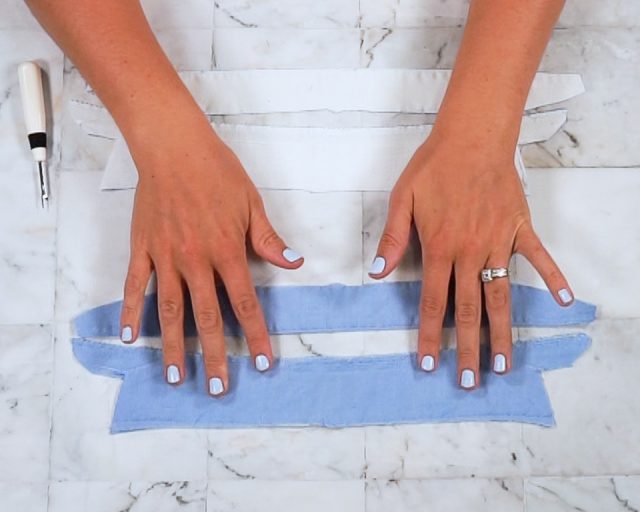
Cutting out the inseam facing pattern pieces from any material is leftover. If y'all don't have enough, you tin employ some lightweight cotton fiber fabric (like quilting cotton) in a coordinating color.
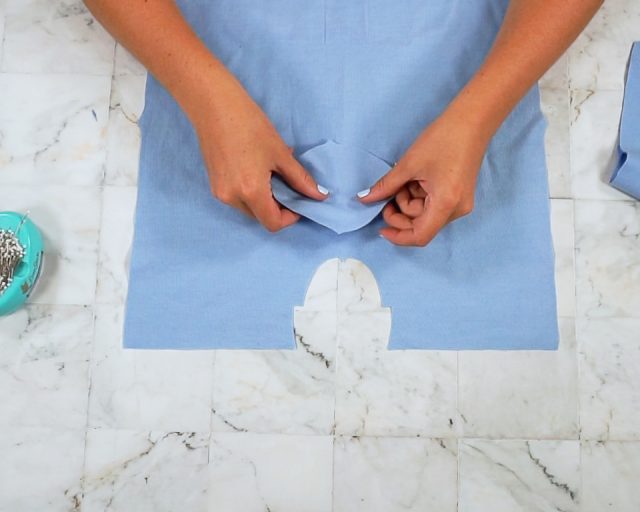
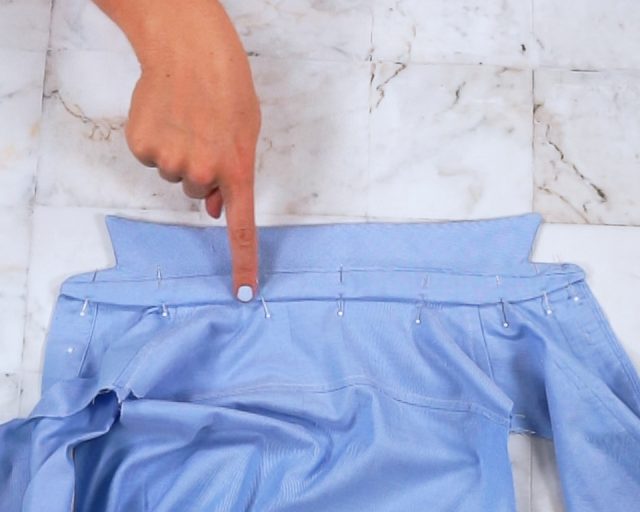
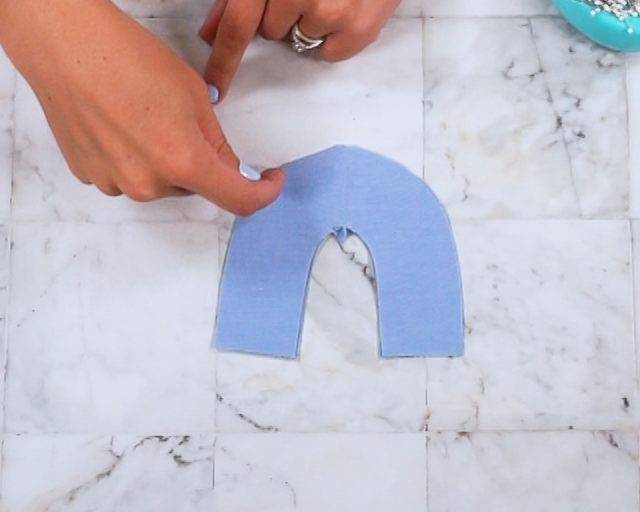
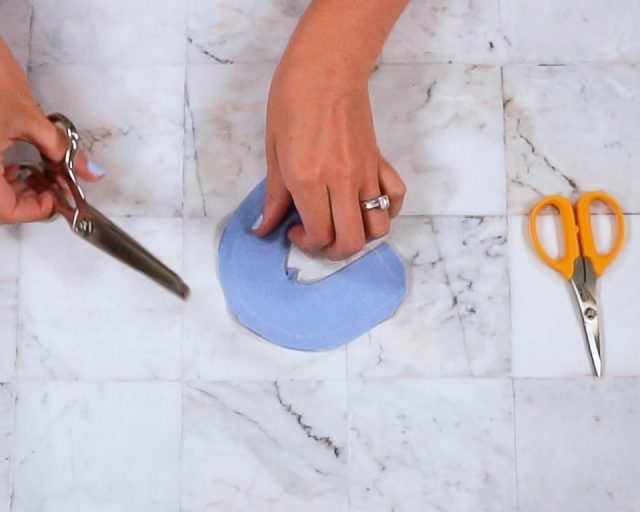
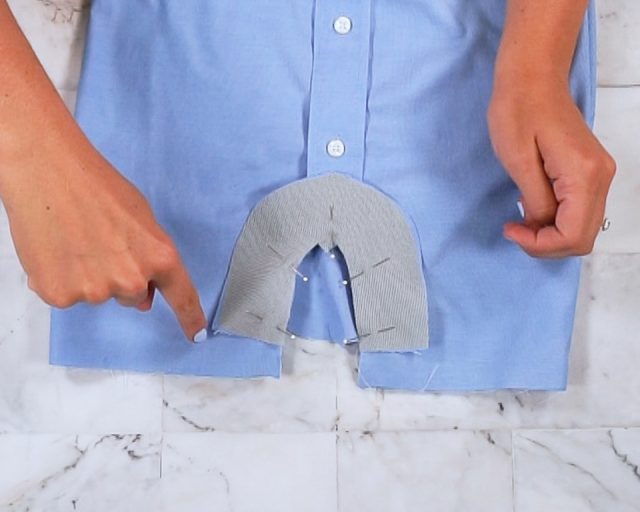
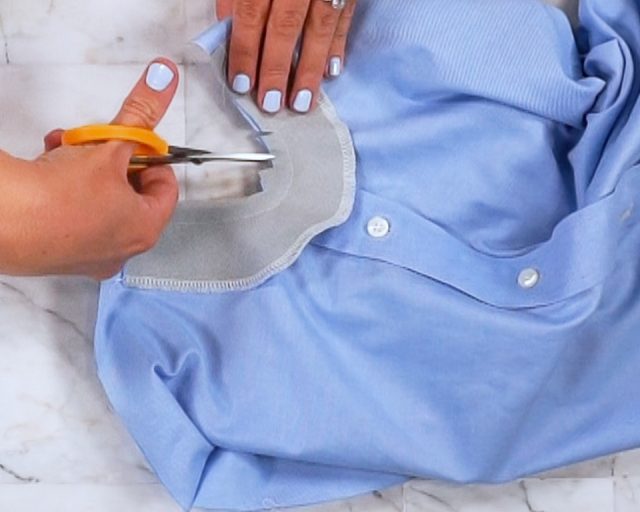
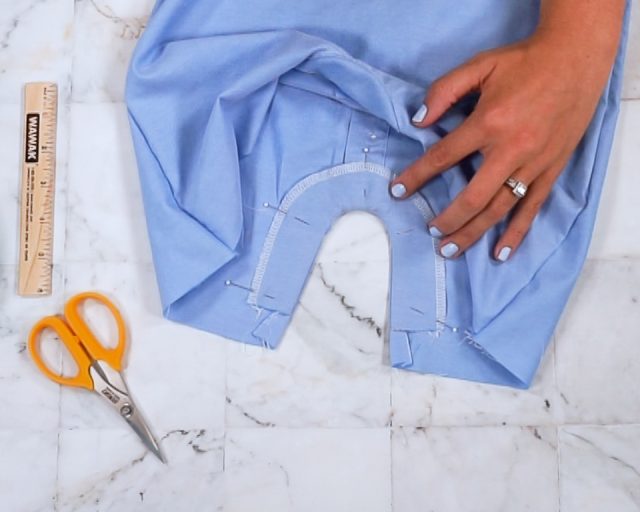
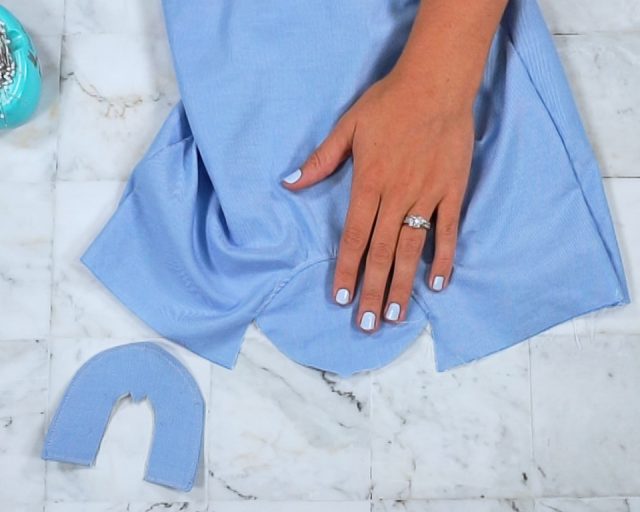
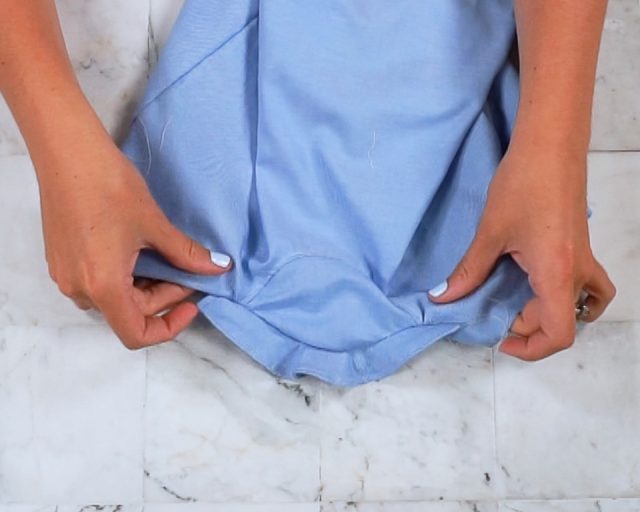
Cut the gusset from a scrap of the shirt. Match up the grainline of the shirt with the grainline of the pattern.
Sewing
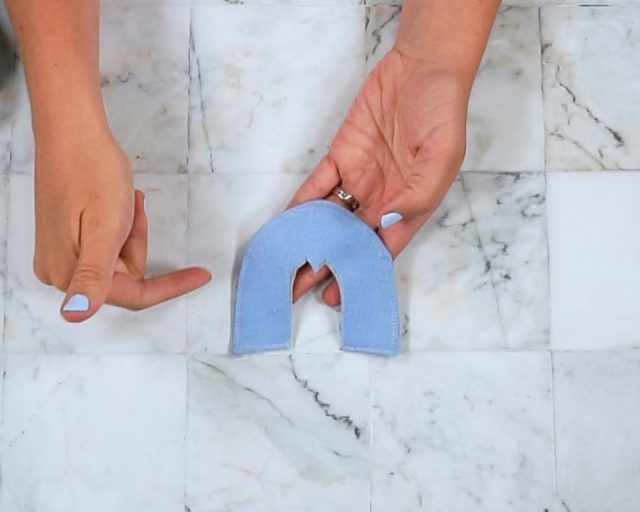
Match upward one center dorsum notch of the back torso pattern pieces and one notch of the gusset with correct sides together. Lucifer up the two sides. Sew the seam and cease the raw edges.
Edgestitch the seam assart towards the body.

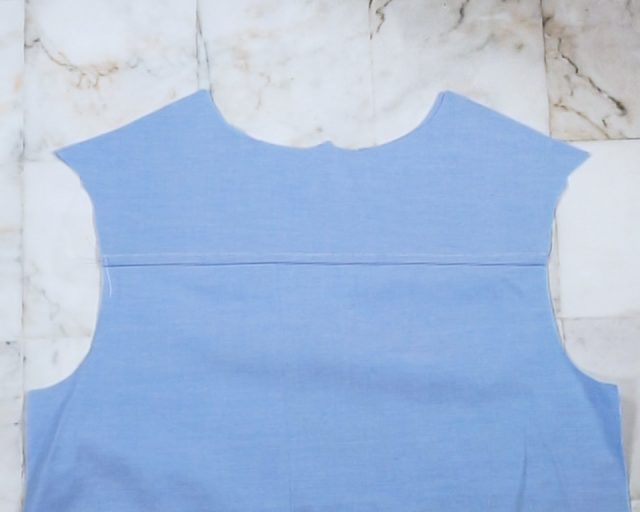
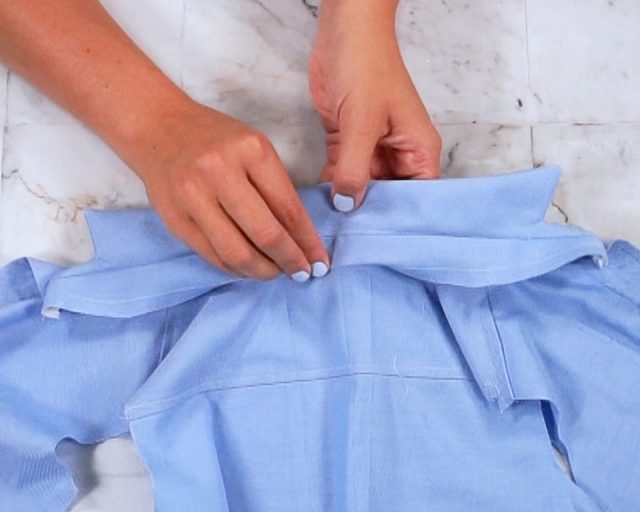
Identify i yoke right side up with the straight side on the top. Place the back body on tiptop right side up with the straight side betwixt the arms on the meridian. Identify the remaining yoke right side down with the straight side on the superlative.
Pin the three layers together in this order.
Sew together the three layers together.
Press the 2 yokes and the seam assart up and abroad from the body.
Topstitch on the yoke 1/iv inch away from the seam to secure the yokes up and away from the torso.
Place the 2 front body pieces right side down onto the right side of the dorsum. Fold the dorsum yoke down and away from the shoulders.
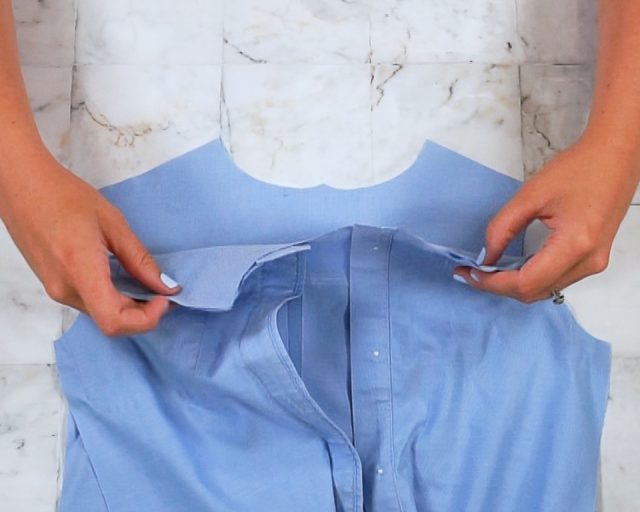
Ringlet up the torso front and the body back pieces into a tiny ringlet until you can sew both yokes. Bring the lower yoke from the lesser and upwards over the roll until all the shoulder seams are matching.
Line up the front shoulder seams with the remaining yoke shoulder seams.
Sew together the three layers of the shoulder seams together.
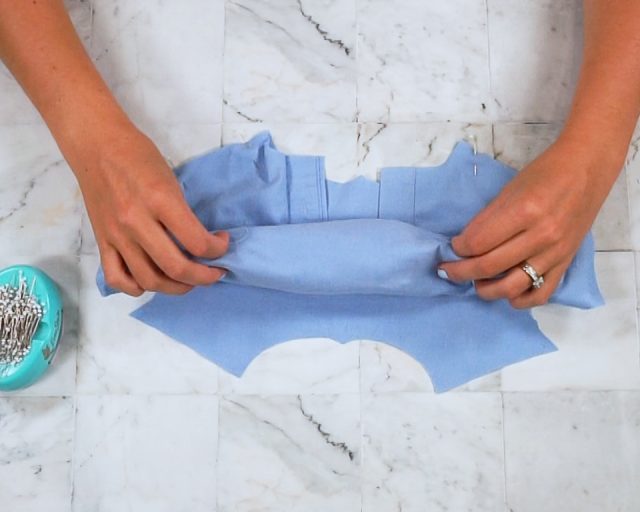
Pull the body roll out of the yokes through the neck hole.
Press the yoke and the seam allowance away from the body. Topstitch the shoulder seams on the yoke i/4 inch abroad to secure the yokes up and away from the body.
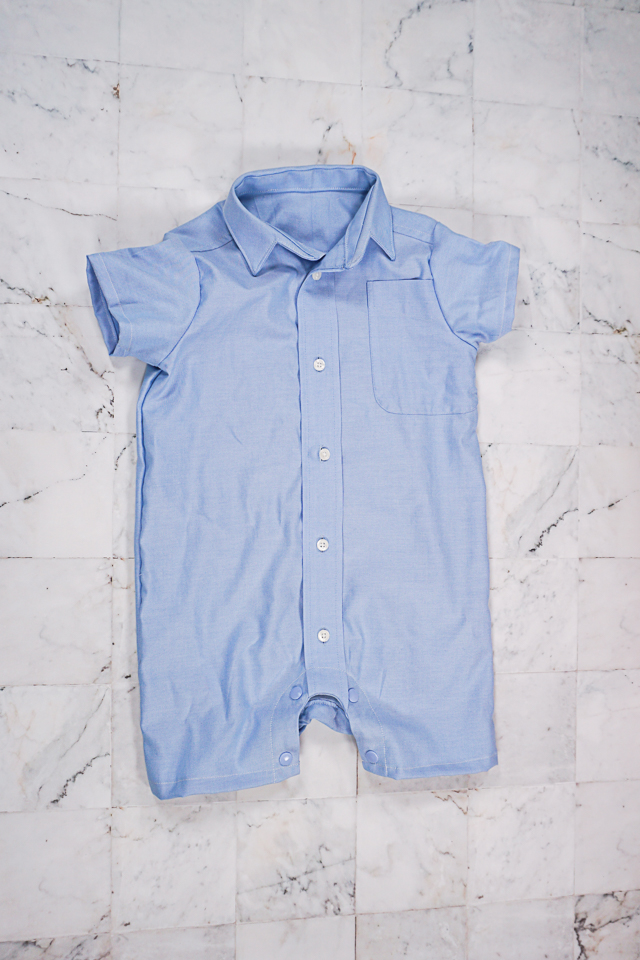
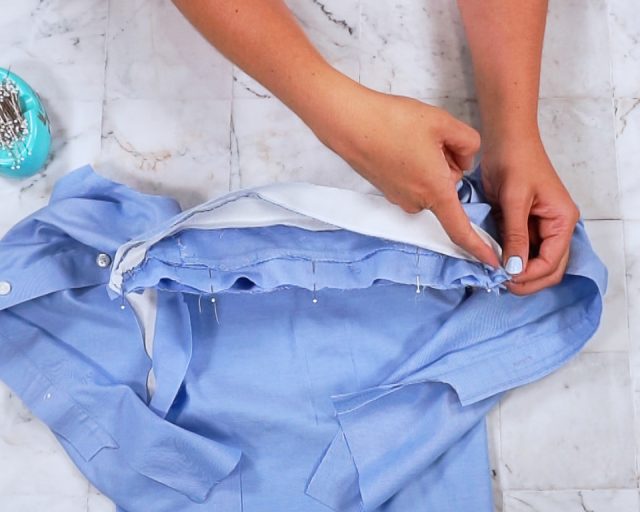
Apply a seam ripper to unpick the seam that runs through the collars. Printing all the collar pieces flat.

Resew the collars onto the stands simply keep them separate so the you accept two collar pieces.
Exit the interfacing on the collar pieces.
If the collar pieces are non interfaced and so add together interfacing to one side.
Identify the collar pieces correct sides together matching all the edges.
Sew together from the curved front end upward and effectually the collar points, and so back downward to the other curved front. Exit the neckline border open.
Trim the points and notch the front corners to reduce bulk. Clip the inner point.
Plough the neckband correct side and poke out the corners. Printing the neckband flat.
Sew together a line on the interfaced side of the collar 3/eight inch from the edge along the neckline.
Identify the right side of the uninterfaced side of the collar to the correct side of the cervix. Match up the front and the center dorsum.
Sew the pieces together but do not stitch through the neckband seam on each side.
Printing the seam allowance and collar up away from the body.
Fold the border with the iii/eight inch stitching guide under and pin to the neckline so that all of the collar is enclosed.
Edgestitch along the neckline and around the collar to go along the edges dainty and to close the pigsty.
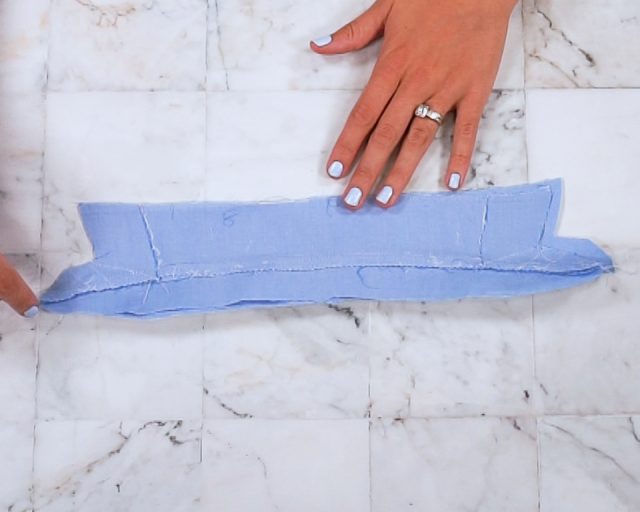
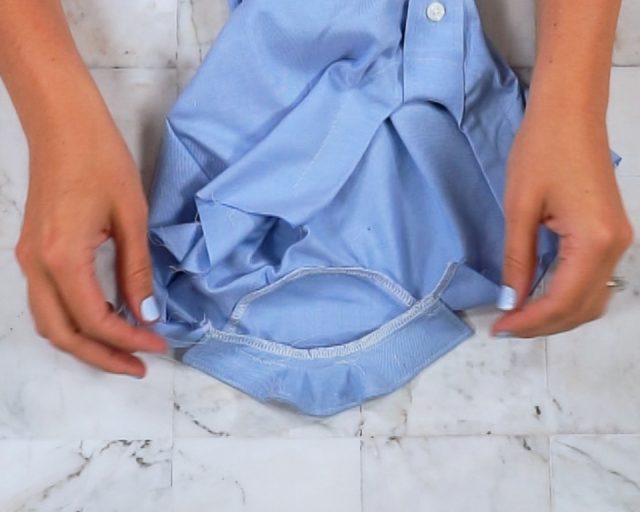
Interface the front inseam facing. End the outer curve. Interface one of the dorsum inseam facings.
Identify the back inseam facings right sides together. Run up the bottom straight edges and the outer curve.
Notch the outer curved slice. Trim the outer ii corners.
Turn the back inseam facing right side out and poke out the corners and curves. Press flat.
Edgestitch around the finished seam.
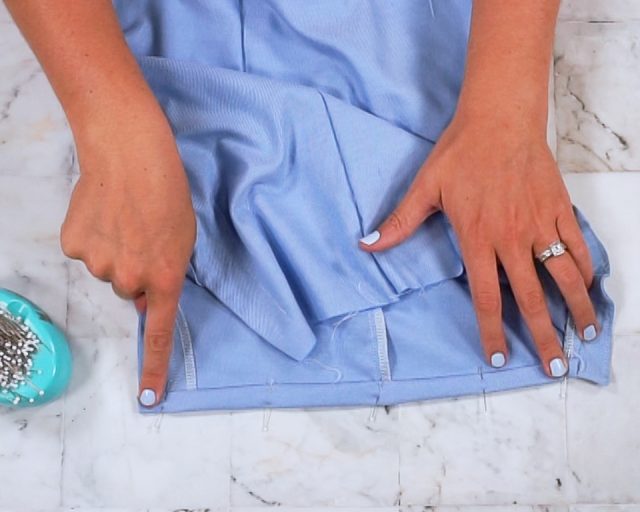
Place the bottom of the button plackets on pinnacle of each other and tack closed with a little straight sew.
Place the front facing on the front torso piece. Line up the bottom edges with the top of the hem and the center front with the heart of the placket.
Stitch around the inner curve.
Prune the inner curve.
Flip the facing to the inside of the front end body and press in identify. Sew the facing in place i inch abroad from the inner curve.
Place the dorsum inseam facing on the inside curve of the back inseam. Match up the centre marks and the bottom of the facing with the meridian of the hem.
Sew the seam carefully since the shape of the curves change. Terminate the edges.
Press the seam allowance towards the body and away from the facing.
Edgestitch the seam allowance towards the body and away from the facing.
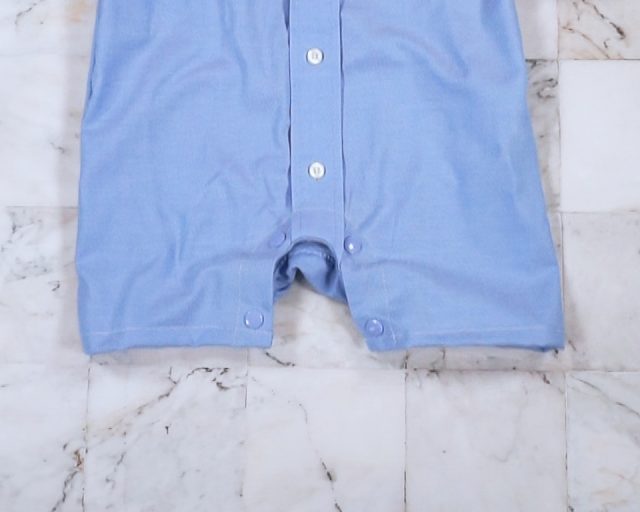
Add 4-8 snaps depending on the size you make to the front inseam and back inseam facing. A guide for the tiptop and bottom snaps was given on the pattern pieces. Make full in a snap in between if needed.
Go detailed data about installing snaps.
Place the sleeves in the armscye with right sides together matching edges and notches.
Stitch the seams and finish the raw edges.
Printing the seam abroad from the trunk.
Fold the sleeve hem up towards the wrong side of the sleeve 1/2 inch and then another 1/2 inch. Sew 3/viii inch from the bottom border. Press in place.

Line the side seams and sleeve seams correct sides together. Lucifer up the armscye seams. Sew the seam and cease the edges.
Press the seam allowances towards the back.
Tack the sleeve seam allowance towards the dorsum of the sleeve.
Fold the hem up i/two inch and and then another 1/ii inch. The edges of the facing should be tucked inside the hem. Sew together three/8 inch from the bottom edge. Press in place. You lot finished the romper!
Go the gratis Men's Shirt Babe Romper sewing pattern!
If you make something using this pattern, I'd love to see! Delight share information technology on social media with the hashtag#heatherhandmade and tag me!
You have Successfully Subscribed!
Source: https://www.heatherhandmade.com/mensshirtbabypatternromper/
Post a Comment for "How to Make a Baby Dress Out of a Man's Shirt"